Explore the top 10 hardest Elden Ring DLC bosses in Shadow of the Erdtree – With weaknesses, and tips to defeat each boss up to the final fight with Radahn.

The Shadow of the Erdtree DLC for Elden Ring introduces a massive expansion filled with deadly new foes, twisted environments, and some of the most challenging bosses FromSoftware has ever designed. If you haven’t accessed the DLC yet, here is how to unlock Shadow of the Erdtree fast. Whether you’re a seasoned Tarnished or returning for the realm, here’s a full list of Elden Ring DLC bosses ranked by difficulty, based on player experience, mechanics, and raw challenge.
Top 10 Elden Ring DLC bosses Ranking
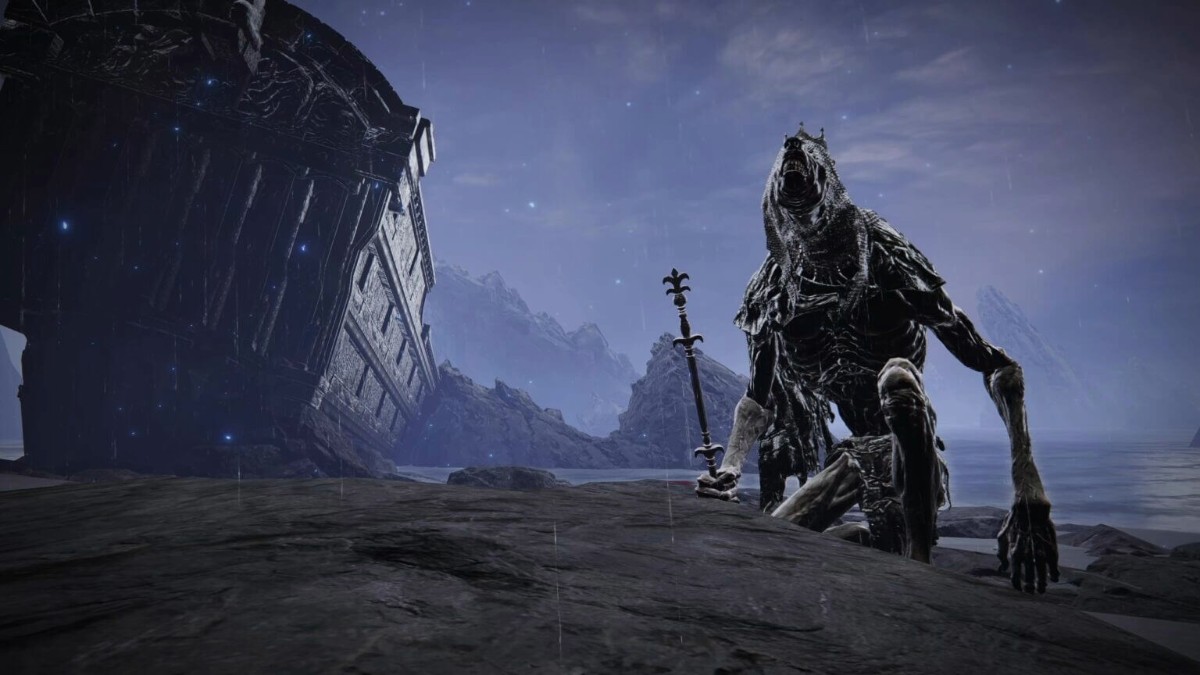
1. Promised Consort Radahn (Hardest)
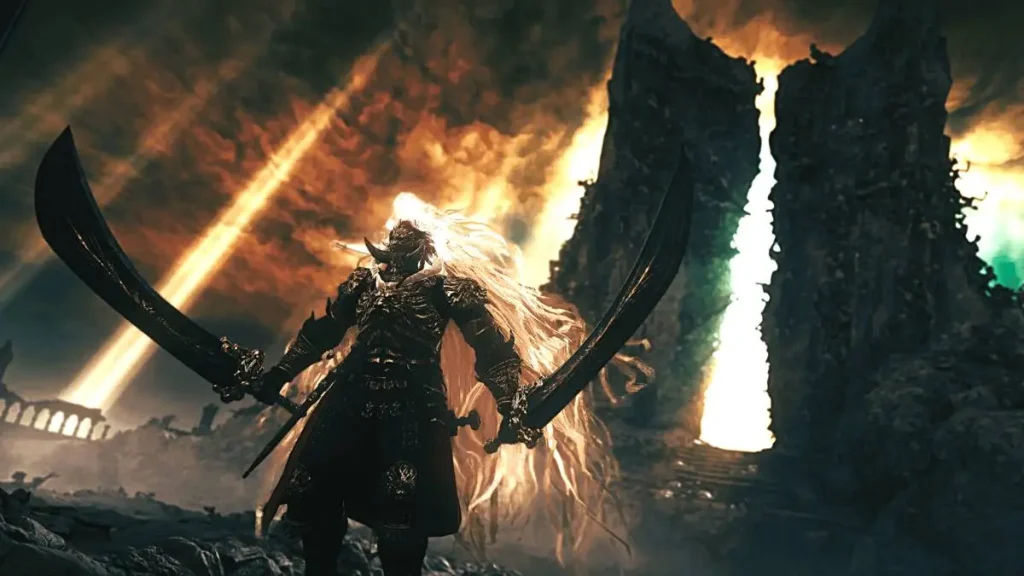
Location: Enir Ilim
Radahn returns as the final boss in a devastating dual-phase battle. The first phase showcases his colossal gravity-based attacks, with enhanced agility and brutal AoE shockwaves. In the second phase, Miquella enters the fight, transforming the encounter into a nightmare of celestial magic and unpredictable aggression. It demands precise dodging, extreme endurance, and expert resource management. Expect nothing less than FromSoft’s hardest boss yet.
- Weakness: Bleed and frost work moderately well in phase one; fire has minimal effect.
- Tips to Beat: Use Spirit Ashes with high HP to absorb pressure. Roll toward Radahn’s shockwave slams. In phase two, maintain mid-range to bait Miquella’s spells, and punish the slow recovery after his moonlight bursts.
2. Messmer the Impaler
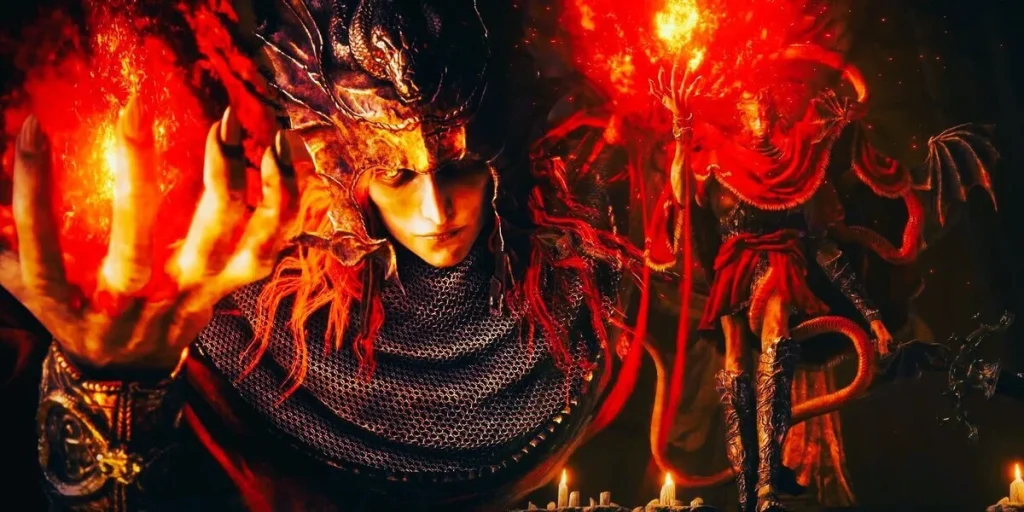
Location: Shadow Keep
Messmer wields a spear engulfed in flame and strikes with rage-fueled precision. His attacks blend fire damage, quick thrusts, wide sweeps, and delayed AoEs that catch greedy players off guard. His arena is tight, adding pressure to the fight. Lore-rich and cinematic, Messmer is the Malenia of the DLC in terms of fan hype and brutality.
- Weakness: Weak to frost and slightly vulnerable to stagger; highly resistant to fire.
- Tips to Beat: Equip gear with strong fire resistance and use frost-based weapons. Watch for delayed AoE timing—dodge late—and punish his flame burst recovery. Don’t let him corner you in the arena’s edge.
3. Rellana – Twin Moon Knight

Location: Castle Ensis
Rellana is a ghostly swordswoman who uses two magical blades powered by moonlight. Her fight feels like a dance: fluid combos, sweeping attacks, and sudden teleports. She also casts AoE moonlight magic mid-combat. While her health is manageable, her relentless speed and unpredictability make her a standout challenge.
- Weakness: Susceptible to lightning and stagger; can be interrupted with heavy weapons.
- Tips to Beat: Stay aggressive but calculated—use lightning-infused weapons or incantations. Dodge diagonally through her teleport attacks and punish her immediately after moonlight AoEs. Keep her locked in melee to interrupt casting.
4. Midra – Lord of Frenzied Flame

Location: Abyssal Woods
Midra is a deranged embodiment of chaos and madness. His arena pulses with visual distortion and fire, and his move set includes flame whips, grab attacks, and madness-inducing screams. Vision blur and panic build-up mechanics make this fight more of a psychological struggle than a purely physical one.
- Weakness: Weak to cold and sleep; immune to fire and madness.
- Tips to Beat: Equip talismans that resist madness buildup and use cold weapons to control pacing. Stay out of range when he screams, and dodge sideways to escape whip combos. Sleep pots or arrows can help reset him briefly.
5. Romina – Saint of the Bud

Location: The Garden of Miquella
Romina is a poison-wielding boss who uses staff combos and summons spectral butterflies that inflict rot and poison. Her fight is deceptive: slow and graceful at first, then explosive once her HP drops. She punishes passive play with DOT (damage over time) stacking.
- Weakness: Fire, holy damage, and rot resistance are key.
- Tips to Beat: Use fire or holy incantations to melt through her resistances. Keep pressure on to prevent butterfly summoning. Equip boluses or talismans that resist scarlet rot and poison buildup.
6. Commander Gaius
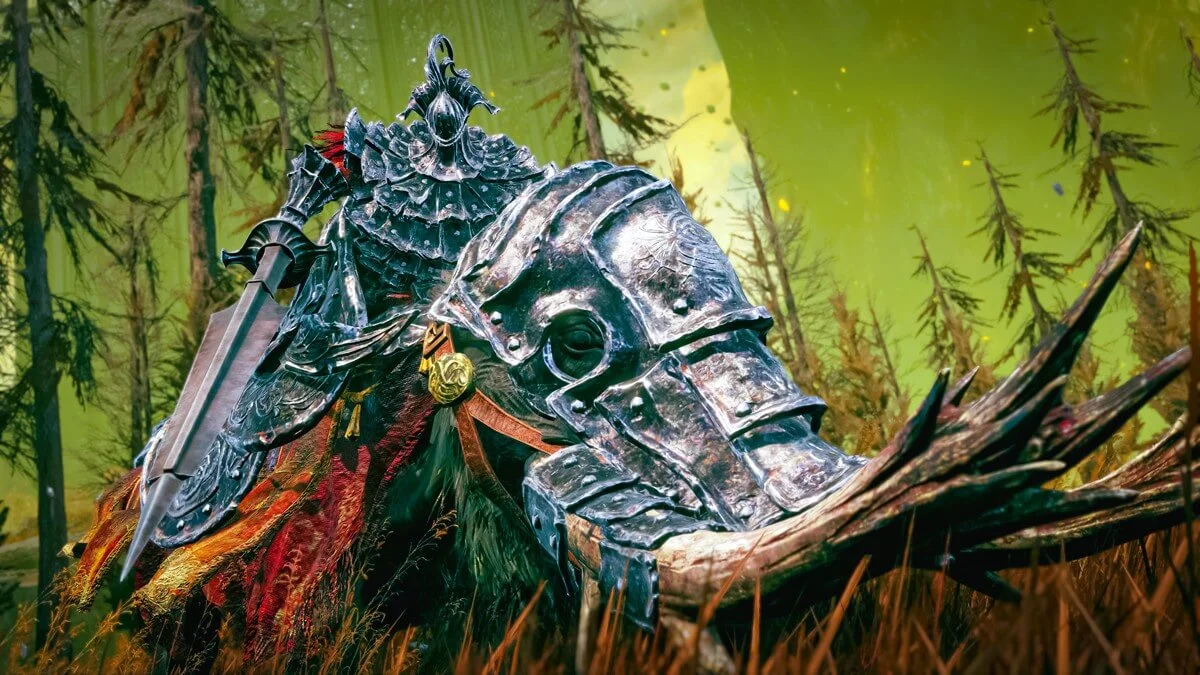
Location: Shadow Keep
A hulking brute riding a massive boar-like beast. Gaius has long-range shockwave attacks, beastly lunges, and a devastating overhead slam. He shares some design DNA with Draconic Tree Sentinel, but with more raw speed. This is a test of poise and roll-timing.
- Weakness: Lightning-based attacks and bleed buildup work well.
- Tips to Beat: Time rolls late to avoid shockwaves. Use fast bleed weapons or lightning spells to keep him bleeding between charges. Attack the beast’s sides after he misses his overhead slam.
7. Putrescent Knight

Location: Scadu Altus Catacombs
A decaying knight corrupted by rot. He uses a heavy sword and shield combo and sporadic toxic clouds. His attacks are slow but wide-reaching, and he punishes players who don’t manage spacing carefully. Not the fastest or most aggressive, but deceptively punishing.
- Weakness: Vulnerable to fire, holy, and ranged damage.
- Tips to Beat: Kite him with ranged attacks and avoid melee during his toxic bursts. Equip poison-resistant gear and use fire weapons to stagger his slow windups.
8. Scadutree Avatar
Location: Scadutree Basin
Think Erdtree Avatar 2.0. This giant tree-being uses holy magic and powerful stomps. Not a mechanically complex boss, but tanky with large AoEs. Ideal for newer players needing upgrade materials and a sense of progression.
- Weakness: Weak to fire and frost.
- Tips to Beat: Equip fire weapons and circle around to avoid frontal holy attacks. Use summons to distract while you chip away at its large HP pool. Jump attacks are great for quick burst damage.
9. Divine Beast Dancing Lion
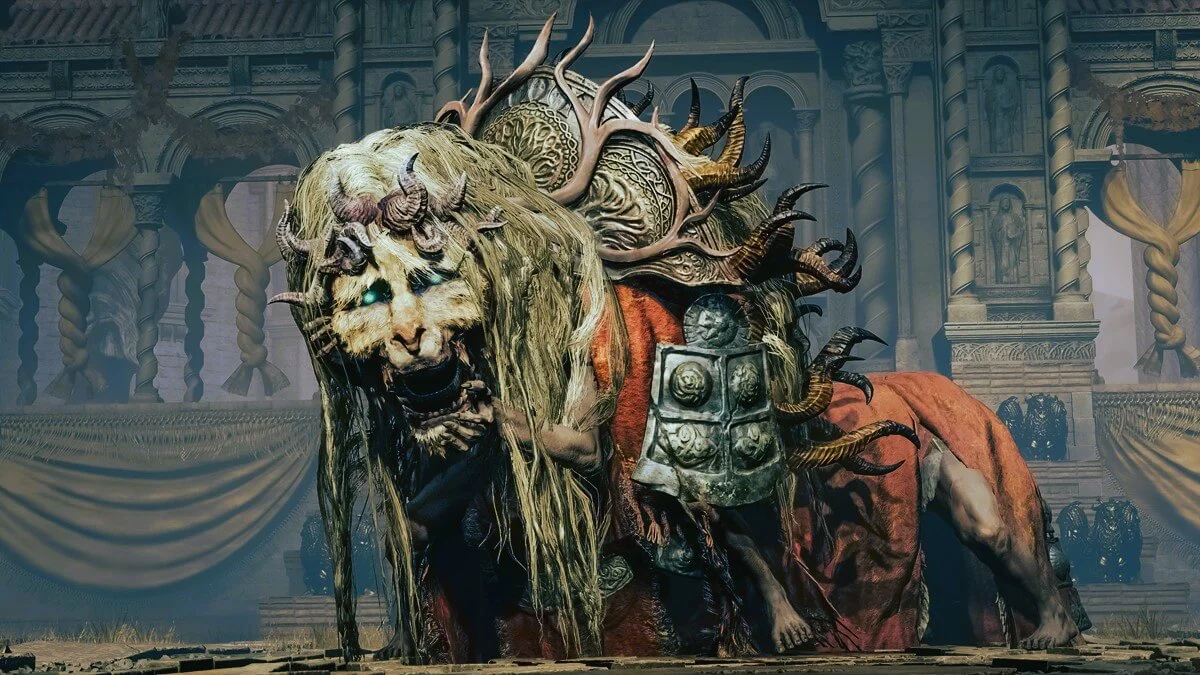
Location: Belurat, Tower Settlement
One of the more unique bosses visually. A chimera-like lion that uses lightning, wind, and ice attacks. Its movements are erratic and acrobatic, but its HP is low and many of its patterns are readable. This is a mid-tier fight, great for early DLC progression.
- Weakness: Bleed and fire damage are effective.
- Tips to Beat: Dodge laterally rather than backward to avoid aerial dives. Use fast bleed weapons to shred its low HP bar. Watch for telegraphed element changes and punish in transition.
10. Demi-Human Queen Marigga
Location: Cerulean Coast
Marigga leads a tribe of demi-humans and uses fast, sweeping attacks with short cooldowns. She also summons mobs, making the fight feel chaotic early on. Weak to AoE and stagger-heavy weapons. She’s more of a side boss, but still fun.
- Weakness: Vulnerable to fire, strike weapons, and AoE.
- Tips to Beat: Open with AoE spells or ashes to eliminate adds. Lock onto Marigga with heavy weapons to stagger her. Keep distance early to avoid mob swarming, then close in hard once she’s alone.
Other Bosses Worth Mentioning
- Bayle the Dread – A terrifying dragon atop Jagged Peak, with explosive fire and lightning.
- Dryleaf Dane – A martial arts-based human boss with parries, counters, and fast combos.
- Furnace Golems – Giant mechanical constructs with environmental weaknesses.
- Fire Knight Queelign – Aggressive knight with flame-based combos; appears multiple times.
- Moonrithyll, Carian Knight – Sorcery-focused knight using Glintblade Phalanxes.
Final Thoughts
Shadow of the Erdtree doesn’t hold back. Whether you’re facing off against cosmic horrors like Radahn and Miquella or navigating the madness-fueled arenas of Midra and Romina, each encounter brings its own brutal flair. The Elden Ring DLC bosses elevate the experience, raising the bar not just in difficulty, but in storytelling, world-building, and sheer spectacle.
👉 Subscribe to Joke.gg for in-depth Elden Ring guides, lore breakdowns, and story-rich content. From hidden mechanics to the wildest theories, we’ve got everything you need to stay ahead in the Lands Between and beyond.